


Introduction
Converting an image to embroidery file is complete process of giving pathes to needle of embroidery machine. let’s go in depts of this process. Embroidery files are a type of image file that are used by embroiderers to transfer designs from one surface to another. They are made up of a series of crosshairs, or stitches, that can be used to create designs on cloth. Images can be converted to embroidery files using software that is specifically designed for this purpose.
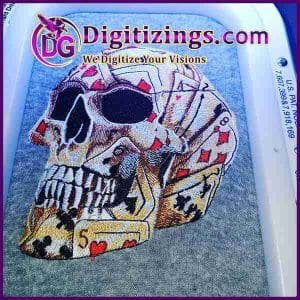
We are excited to offer our best image digitizing service. We can convert any image into an embroidery machine file for low cost and a super fast turnaround time. Our team of experienced and skilled engineers can handle any image conversion task with ease. Get your photo digitizing services now and convert your images to embroidery files!
Converting Image To Embroidery File Free & Paid

Converting an image into an embroidery file for free is not hard. Making custom embroidered gifts with your own graphics is a great way to personalize your artwork and make a great gift for your friends and family. However, for this, it is better to convert your image into an embroidery file, and even better if I can do this for free. I’ll clarify in this article.
It is not difficult to digitize a photographic image to convert into an embroidery file for free, as you simply need to use a free digitizing software package for that purpose. The main issue is that it is critical that you convert your image file to the correct format, digitize the photo, then convert it into an embroidery file.
Don’t panic! We are here to help you transform a digital photo into an embroidery design. There are plenty of free or paid software out there that you can use to convert a jpg file to an embroidery pattern. However, converting photos into machine embroidery patterns for free, even more so, isn’t uncomplicated.
What is photo or image digitizing?
Photo or image digitizing is the process of converting a traditional two-dimensional image into a digital format that can be used for various purposes, such as printing, editing, or embroidery. In the context of embroidery, image digitizing involves converting a photo or other image into a embroidery format that can be read by an embroidery machine and used to create a stitched design.
The digitizing process typically involves using specialized software to analyze the image and create a digital representation of the design, including the placement of individual stitches and the selection of stitch types. The resulting digital file can then be loaded onto an embroidery machine, which uses the information in the file to create the stitched design on fabric or other materials.
The process of photo or image digitizing can be complex and requires a combination of technical and artistic skills, as well as specialized software and equipment. It is important to choose a best image digitizing service or software that has a good reputation and can produce high-quality results, to ensure that the final embroidered design meets the desired quality and accuracy standards.
Why important image digitizing for embroidery?
photo or Image digitizing is important for embroidery because it allows the creation of intricate and high-quality designs that can be easily reproduced on a variety of materials. The digitizing process helps to ensure that the final stitched design is accurate and visually appealing, and can make the embroidery process faster and more efficient.
Some of the specific reasons why image digitizing is important for embroidery include:
Accuracy:
live Image digitizing allows for precise control over the placement of individual stitches and the selection of stitch types, which can help to ensure that the final design is accurate and visually appealing.
Repeatability:
Digitized designs can be easily stored and reproduced, allowing for the efficient production of multiple identical designs without the need for manual labor.
Complex designs:
Image digitizing allows for the creation of complex and intricate designs that would be difficult or impossible to produce manually.
Improved efficiency:
real Image digitizing can make the embroidery process faster and more efficient, as the embroidery machine can follow the digital instructions in the digitized file to create the design, rather than requiring manual input.
Versatility:
Image digitizing allows for the creation of designs that can be used on a wide variety of materials, including fabrics, hats, bags, and more.
Overall, image digitizing is an important part of the modern embroidery process, as it allows for the creation of high-quality, complex designs that can be easily reproduced and used on a variety of materials.
Types of image digitizing for embroidery
There are several different types of image digitizing for embroidery, each with its own set of techniques and considerations. The most common types of photo or image digitizing for embroidery file include:
Auto-Digitizing:
This type of digitizing involves using software to automatically converting an image into embroidery file. The software uses algorithms to determine the placement of stitches and the selection of stitch types, based on the image and the capabilities of the embroidery machine.
Punch Embroidery:
This type of digitizing involves using specialized software to create an embroidery file by manually placing individual stitches in the design. This type of photo digitizing allows for greater control over the final result, but it is also more time-consuming and requires a higher level of skill and experience.
Photo Stitching:
This type of digitizing involves converting an image into an embroidery file by using software to place stitches in a way that mimics the shading and texture of the original image. Photo stitching is often used for images with fine details and shading, such as portraits or landscapes.
Vector Digitizing:
This type of digitizing involves converting an image into an embroidery file by using software to trace the image and convert it into vector art. Vector art is a type of digital artwork that is made up of lines and shapes, rather than pixels, and is often used for logos and simple graphics.
Applique Digitizing:
This type of digitizing involves creating an embroidery file for an applique design, where pieces of fabric are sewn onto a background fabric to create a picture or design. Applique digitizing requires specialized software and techniques to create an accurate and visually appealing result.
The type of image digitizing used for a particular design will depend on the image, the capabilities of the embroidery machine, and the desired final result. It is important to choose the appropriate type of digitizing for each project to ensure the best possible results.
How to convert image to embroidery file?
The process of converting an image into an embroidery file involves several steps, including image editing, color matching, and stitch placement. Here is a general outline of the process:
Image preparation:
Clean up and edit the image as needed to prepare it for conversion. This may involve cropping, resizing, or simplifying the image to make it more suitable for embroidery.
Color matching:
Choose thread colors that match the colors in the image, and create a color palette for the design. Some embroidery software programs have a color matching tool that can assist with this process.
Stitch placement:
Use embroidery software to place the stitches in the design, taking into account the capabilities and limitations of the embroidery machine being used. The software will generate the stitch file that will be loaded into the machine for stitching.
Embroidery file format:
Choose the appropriate stitch file format for the embroidery machine being used, such as DST, PES, XXX, or others.
Testing:
Before stitching the design on the final product, test the design on a small piece of fabric to ensure it looks as desired and that it will stitch correctly on the machine.
It is important to note that the specific steps and tools used to convert an image into an embroidery file will vary depending on the software and machine being used. It may also be helpful to take an embroidery class or seek the guidance of an experienced embroiderer to learn the best practices and techniques for converting images into embroidery files.
Best process of Converting an image to embroidery file services
There are several online services and software programs that can convert an image into an embroidery file. These tools work by converting the image into a stitch file format, such as DST, PES, or XXX, which can then be loaded into an embroidery machine for stitching.
Here are a few popular options for converting images to embroidery files:
Digitizings.com:
This is an online service that offers a wide range of embroidery designs, including the option to convert your own images into embroidery files.
Wilcom:
This is a professional embroidery software that can convert images into embroidery files. It is a paid software, but it is widely used in the industry for its advanced features and quality results.
Embird:
This is another professional embroidery software that can convert images into embroidery files. It offers a range of tools for editing and customizing the design, and it is also a paid software.
ITHINKSO:
This is a free online tool that can convert images into embroidery files. It is a simple and easy-to-use tool that is suitable for beginner and hobbyist embroiderers.
It is important to note that the quality of the embroidery file will depend on the resolution and complexity of the original image, as well as the capability of the embroidery machine being used. It is a good idea to test the design on a small sample piece of fabric before stitching it on the final product.
Why Converting an image into embroidery file is difficult?
Converting an image into an embroidery file can be a challenging task because it involves several complex steps and considerations. Here are a few reasons why this process can be difficult:
Complexity of the Image:
Images with fine details, shading, and multiple colors can be difficult to translate into an embroidery file, as the machine has limited capabilities and stitch types. The more complex the image, the more challenging it can be to create an accurate and visually appealing embroidery design.
Color Matching:
Converting an image into an embroidery file requires matching the colors in the image to the available thread colors on the embroidery machine. This can be a difficult task, as colors can look different on a computer screen compared to the actual thread colors.
Stitch Types:
Different types of stitches are used in embroidery, each with its own strengths and limitations. For example, some stitches are better for filling in large areas, while others are better for fine details. The software used to convert the image into an embroidery file must choose the appropriate stitch type to accurately recreate the image.
Embroidery Machine Limitations:
Each embroidery machine has its own set of capabilities and limitations, such as stitch length, needle penetration, and maximum design size. These limitations must be taken into account when converting an image into an embroidery file.
Skill and Experience:
Creating an accurate and visually appealing embroidery design requires skill and experience, as well as a good understanding of the embroidery machine and the embroidery software being used.
Overall, converting an image into an embroidery file requires a combination of technical skills and artistic creativity to produce a high-quality result. It can be a challenging process, but with practice and experience, the results can be very rewarding.
Why you can’t digitize image yourself?
While it is technically possible for individuals to digitize images themselves, there are several reasons why it may be difficult or impractical to do so:
Lack of expertise:
Image digitizing requires a combination of technical skills and artistic creativity, and it can be challenging for individuals who do not have experience in this area to produce accurate and visually appealing results.
Time-consuming:
Digitizing images can be a time-consuming process, especially for complex designs. It can take hours or even days to digitize a single image, which can be impractical for individuals who do not have the time or resources to devote to this task.
Cost of software and equipment:
Image digitizing requires specialized software and equipment, which can be expensive for individuals to purchase.
Learning curve:
Digitizing software can be complex and require a steep learning curve, which can be difficult for individuals who are not familiar with the process.
Quality control:
Ensuring that the final digitized image meets the desired quality and accuracy standards can be challenging, and may require the services of a professional digitizing service.
For these reasons, it is often more practical for individuals to outsource image digitizing to a professional service, rather than attempting to digitize images themselves. This can ensure that the final digitized image is of high quality and meets the desired accuracy and visual standards.
Why outsource image digitizing services?
There are several reasons why businesses and individuals might choose to outsource image digitizing services:
Expertise:
Image digitizing requires a combination of technical skills and artistic creativity, and outsourcing to a professional digitizing service can ensure that the final result is of high quality. Professional digitizing services have the experience, software, and equipment needed to produce accurate and visually appealing embroidery files.
Cost-effective:
Outsourcing image digitizing can be a cost-effective option for businesses and individuals who do not have the in-house expertise or equipment to digitize images themselves. By outsourcing, businesses can avoid the costs of purchasing expensive software and equipment, and the time and effort required to train employees in the use of that equipment.
Time-saving:
Digitizing images can be a time-consuming process, especially for complex designs. Outsourcing image digitizing can save businesses and individuals valuable time and allow them to focus on other aspects of their business or projects.
Quality control:
Outsourcing image digitizing to a professional service can ensure that quality control standards are met, and that the final result is accurate and visually appealing. Professional digitizing services have the experience and knowledge to troubleshoot any issues that may arise during the digitizing process, and to ensure that the final result meets the customer’s requirements.
Flexibility:
Outsourcing image digitizing allows businesses and individuals to scale up or down their digitizing needs depending on their workload, without having to make a long-term commitment to hiring and training employees. This can provide greater flexibility and cost savings for businesses and individuals who do not need to digitize images on a regular basis.
Overall, outsourcing image digitizing services can be a beneficial option for businesses and individuals who want to produce high-quality embroidery files quickly and cost-effectively.
Basic overview of converting image to embroidery file service
Converting an image to an embroidery file service involves several steps, including the following:
Image analysis:
The first step in the process is to analyze the image and determine the best way to convert it into a digitized format that can be used for embroidery. This typically involves determining the placement of individual stitches and the selection of stitch types.
Digitizing software:
Next, the image is loaded into specialized digitizing software, which is used to create the digital representation of the design, including the placement of individual stitches and the selection of stitch types.
Design creation:
File creation:
The final step is to create the embroidery file, which can then be loaded onto an embroidery machine and used to create the stitched design on fabric or other materials.
Quality control:
Before the final file is delivered to the customer, the digitizing service will perform a final quality control check to ensure that the final file meets the desired quality and accuracy standards.
Overall, converting an image to an embroidery file involves a combination of technical skills and artistic creativity, as well as the use of specialized software and equipment. It is important to choose a professional digitizing service that has a good reputation and can produce high-quality results, to ensure that the final embroidered design meets the desired quality and accuracy standards.
Converting Images to Embroidery Files
Embroidery is a fun and creative craft that allows you to decorate fabrics with stitched designs. If you have an image, logo, or text that you want to turn into an embroidery pattern, converting it into a file format your embroidery machine can read is easy with the right software tools. In this post, I’ll explain the basic process of converting images to embroidery files.
Why Convert an Image?
Converting an existing image to an embroidery file lets you customize fabrics with designs you may not readily find among pre-made embroidery patterns or kits. If you have a business logo, favorite photo, your child’s artwork, or some other meaningful image, turning it into stitches is a thoughtful way to create customized items like apparel, bags, blankets, towels or other decorated textiles.
What File Format Do You Need?
Most home and hobby embroidery machines read embroidery files in .PES or .DST format. These contain stitch coordinate data the machine can follow to reproduce your design. More advanced machines may support additional formats too. Before converting an image, check what format(s) your embroidery machine is compatible with.
How to Convert an Image
Specialized embroidery software makes it straightforward to turn images like JPEGs and PNGs into embroidery files. Here is an overview of the basic conversion process:
- Open your image file in embroidery software. Popular options include Embird, Stitch Era Universal, and PE-Design.
- Clean up and prepare the image. You may want to adjust brightness/contrast, remove background elements, or otherwise optimize so it converts well.
- Vectorize the image. This traces outlines so the embroidery pattern has defined edges. You can control settings like stitch density during this step.
- Determine stitch types. Choose which areas you would like to have particular stitches like satin stitching, fill stitches, applique stitching etc. The software will insert appropriate commands.
- Export as an embroidery file in .PES or .DST format (or another supported type).
- Transfer the file to an embroidery USB stick or directly to your machine.
And that’s it – you now have a file ready for your embroidery project! With the right software and some practice, it’s reasonably easy to unlock all kinds of custom embroidery possibilities from your own images.
I hope this overview gives you a good starting point for tackling image conversions. Let me know if you have any other questions!