Convert An Image To Embroidery File Free Best Full Guidance
Convert An Image To Embroidery File Free Best Full Guidance
In this article, we will tell you the best way to convert image to embroidery file format free so that you can digitize an embroidery design. Converting an image to embroidery file format is not a different process than digitizing different embroidery design files.
Process: Converting An Image To Embroidery File
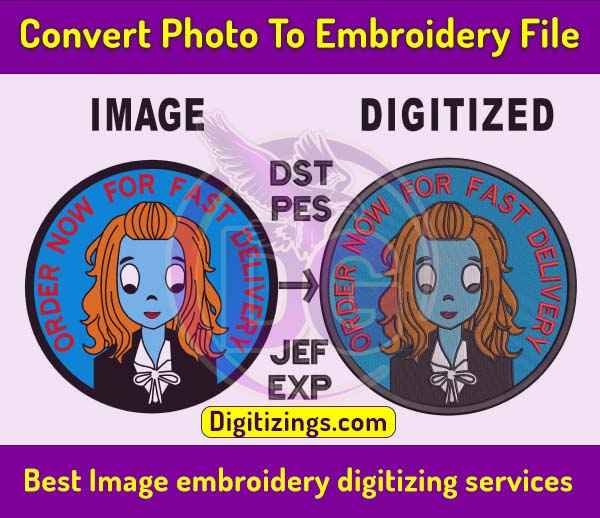
What is converting image to embroidery file?
Converting your images into embroidery files is an excellent method to add a personal touch to your favorite creations. Here is the easiest method to do that for free. Follow these steps to learn more.
Converting an image file into an embroidery file for free is not difficult as long as you have the right software program. You’ll want to be certain that the image file is saved in the correct format before you digitize it, so the digitized image can be converted into a proper embroidery file.
What is an embroidery file?
An embroidery file is a file that your embroidery machine can read to produce the design in the file. The file contains information that your embroidery machine needs to know to produce the design properly. Convert an image to embroidery file free is favorit topic of all embroiders as we have guided them properly.
An embroidery file is a digital embroidery machine file containing embroidery designs. Embroidery files can be created with software programs that allow users to create and edit vector images. Once an embroidery file is created, it can be converted into a format that can be read by an embroidery machine.
It is important to firstly familiarize and understand what is an embroidery files, especially if you’re new to this. You must also know what the most common embroidery files are in order to make the correct conversion.
All of the process of convert an image to embroidery file free results should be machine embroidery file format that can be used to embroider design.
And even in the embroidery design itself, certain information needs to be included in the embroidery files, such as what color thread to use in certain parts, when the threads need to be cut, how knots need to be eliminated, and how the needle has to be changed.
You will likely have to manually enter this information into the software in order for your machine to properly read this data.
Convert an image to embroidery file format services
Important Information how to converting an image to an embroidery file format. We will share with you the most important information on how to convert an image to an embroidery machine file. Converting image to embroidery file is not easy than other embroidery digitizing designs.We will start from the basics so you can understand how this process should go. Before continue we would love to share with you one of the most important news that we are providing special discount on embroidery digitizing and vector art services these days you can also avail this discount by clicking the button below.
Let’s Continue to discuss image to embroidery file conversion.
What exactly is a DST file?
A DST document is the file format used by an embroiderer. It contains the embroidery commands used by the
machine. Each command is an instruction set that are executed by the machine.
An embroidery digitizer is able to create a DST file.
Requirements:
Software for embroidery
A lack of experience in computer operations.
A little effort from you
Artwork file download
Convert embroidery files
Image manipulation to manipulate embroidery art
1. Insert the artwork file into the embroidery program
The first step is to upload your image into the program. This way you’ll be able to convert the image to
embroidery files to perform other purposes.
Click on the menu at the top bar, then hover your mouse over the image, and then choose the image inset file.
Check to make sure that you’ve selected the appropriate options for files when looking for your file.
Select the image file you downloaded in the section required to begin digitizing your embroidery design.
I’m assuming that you’ve successfully uploaded an image file similar to this.
2. Cut the image file before proceeding further
It is better to establish the desired size earlier in the process, rather than later. First we’ll cut the image before
moving ahead.
Click on the image tab in the menu bar to the left and hover your mouse and then select the bitmap that has
been cropped by using the tool for polygons.
Pick a specific part of the image by drawing drawings using the tool called a polygon
The file has successfully cut according to our choice that was second step being Converting an image to an embroidery file.
3. Choose the size that you would like for the image
The next step is to decide how big the design file will be. This will be the embroidery size. So, let’s begin!
Change the metrics you use with us. In this way you’ll be able to input your design’s dimensions in inches
instead of millimeters.This is also most important part of Converting an image to an embroidery file.
Lock the lock icon when you would like to alter the file’s size in both size and width. If not, you can leave it
locked. Enter the length of your item in the width and height field. Be sure to enter it in inches, not mm.
4. Make sure to lock the image before changing an image into embroidery
I’m not going to alter this image. It is best to secure this. By locking the image file, you’re protecting it from
unanticipated modifications.
To check the lock status, click the photo and hit “k,” photo will be locked.
For unlocking, press “shift+k.”
Additional sources
These are the major aspects that are employed in digitization. The letter “m” is utilized for measuring the size of
objects.
Letter “z” is used to indicate zooming in
Letter “shift+z” is used for zooming out.
Maximum length of satin stitch “12.1mm.”
Maximum length for fill/tatami stitches “4mm.”
Jump to the maximum height “7mm.”
We will continue to discuss Converting An Image To An Embroidery File Format
Start logo digitising for embroidery
1. Modifying the measurement option
Change the measurement option. By doing this, metrics provide you with more control over design dimensions.
Because “us” measures in inches, which can make it more difficult to measure tiny objects.
2. Take the object’s measurements at the point of beginning
Before you begin digitizing embroidery it is essential to take measurements of the object prior to the beginning
of your work. This way you will be able to determine the size of the object and decide which stitch is
appropriate for the object. As I stated earlier that different stitches can differ in their length.
by Converting an image to an embroidery file .Thus when you press the “m” key on your keyboard, you can determine the length of the object.This was also most importantpart of Converting An Image To An Embroidery File Format.
3. Then, begin the digitization process of embroidery to create rings objects in the picture.
In default it is a satin stitch chosen. Therefore, there is no reason to alter it. Select the ring tool on the toolbar
menu. Hold the left mouse button and to click in the middle of the sequin/ring , and then move it towards the
edge of the circle’s circumference. It will draw the width of the circle’s circumference. Once again, you must
click on the circle’s circumference point and it will draw circles of the same size.
In at the third and fourth steps you’ll draw an inner circle’s in both width and height. Drag your mouse to the
center of the circle and click. This is how you draw your inner circle’s in height. In the final step, you will repeat
the procedure as you did in the previous step for outside circle.
Drag your mouse to the center of the circle will draw the entire width that the circle’s inner circumference.This point is also having a good value to Converting An Image To An Embroidery File Format.
4. Modify the colors of embroidery objects
The color bar is in which you can select certain colors. It will be located in the lower right corner of the screen for design view.
In the beginning, you must choose the object to which you would like for the coloring to be applied.
At the lower part in the colour bar choose the color you want to use.
This will apply automatically on the object automatically.
This process can be done to create a single item or a whole design in one go.
5. Know the copy and paste function.
Short keys
“Left the mouse button” for copying objects
“T” for design accurate view
“S” to conceal the design stitches, or switch to wireframing view
If you’d like to hide or see designs it is possible to do so by using the below short keys.
6. The second goal is thread con
Select the circle tool in the menu on the left sidebar where you have selected the rings tool. Other tools are
displayed when you press and hold the left mouse button while aligning your mouse cursor with your thread’s
con.
Your mouse should be in the middle point of the thread-colored yellow object. Press the left mouse button, and
then drag it around the circumference of the circle.
When you do this it will create a circle that will then be drawn, and then automatically change into an
embroidery design. However, there’s an issue that you might have noticed, or not. The most important thing is
that the circumference of our circle larger than the length of our satin stitch.
We can’t convert it into an embroidery stitch. In order for it to appear clean and precise, we need to convert it to
tatami or fill in a stitch embroidery file.
7. Repeat the copying and pasting procedure
When you look at a picture, you will notice that there are more than two identical objects within the picture. In
this case, it is more efficient to digitize just one item more efficiently instead of each in isolation. In our example
thread con, we have two similar objects. We’ve been able to convert an image into a embroidery free form.
We now need duplicate and then paste this object we transformed into embroidery. The process is exactly the
same that we used to do before. Right-click on the finished part of the image, hit CTRL then drag the image over
the exact image.So this very important part to Converting An Image To An Embroidery File Format.
8. Repeat the step to change the color
The process of changing the color is identical to the one we’ve previously done in the first step.
9. Thread sketching con
Select the correct tool for the appropriate object. To deal with threads, we’re going to utilize an input “A” tool.
Just hover your mouse to the left and click on the tool.
After selecting the tool, you can punch it to match your photo like we did previously in chapter. The process is
exactly the same for image cropping.
After you’ve created your thread cons the next step will be to change the color. I’m sure that you are aware of
how to alter the color.
Modify the type of stitch in the event that your default stitch is satin. Due to the size of the object that we are
unable to use the an satin type stitch. So we must change it to tatami type. To do this, choose your object
first , then fill stitch using the top stitch menu.
The upper and lower parts of your thread con will be hidden behind an object that was recently digitalized.
This is done by cutting and paste the files that are in front of your thread con. Following the completion of the
above step, your image should appear like this.
10. Let’s begin working on pins
The pins you have seen are blue, so the process will be similar to the one we’ve used on other objects. In the
beginning, we will need to create needle-like designs in pins. In order to do this, we’ll make use of an
instrument.
The tool is one you have already heard of. The next step is creating a circle, the similar to the
bottom and top shapes that the thread has.
11. Converting needle shape to machine embroidery form
It’s so easy using any input device to sketch a line for a needle and then create a needle hole. If the shape of the
upper part is big enough, remove the shape away from your main item.
If not, make a small shape that is higher
on your main piece of art.
12. Then, finally, giving the shape to the thread lines of an image by using triple run
Choose the tool called triple run at the lower part in the tool for input. Make the left mouse click and hold it for a
short time. After a few seconds, different tools will be displayed Select the tool you require from the available
options and begin working with it.
Begin at the point of beginning and follow the same procedure as drawing straight line using nodes. Continue
to overlap and draw first the bottom object and the higher later. Also, you can change the color to match what
you’ve previously done with other objects.
This entire process is known as the conversion of jpeg to an
embroidery file.or the conversion of png into an embroidery file. The final view of our image will be as.
Setting up additional settings to complete work
To complete the project, we need to make some adjustments prior to sending our project over to the computer.
What are we required to do?
These are additional settings that we’re planning to apply to our project. For example, Florentine effect on
thread con and trims, stitch density and so on. Follow the steps
1. Appling Florentine effects on thread con
2. Add Underlay to the lower part of the objects
3. Travel in the style
It was all most important informations regarding How to Converting An Image To An Embroidery File
Format,
If you have any question please feel free to get in touch with us.
If You require Embroidery digitizing services for your embroidery machine?
With a super quick turnaround and outstanding quality? Just click here to get no-cost quotes within
less than 3 minutes.
Thank you so much for reading our blog post, This article was published by Digitizings

